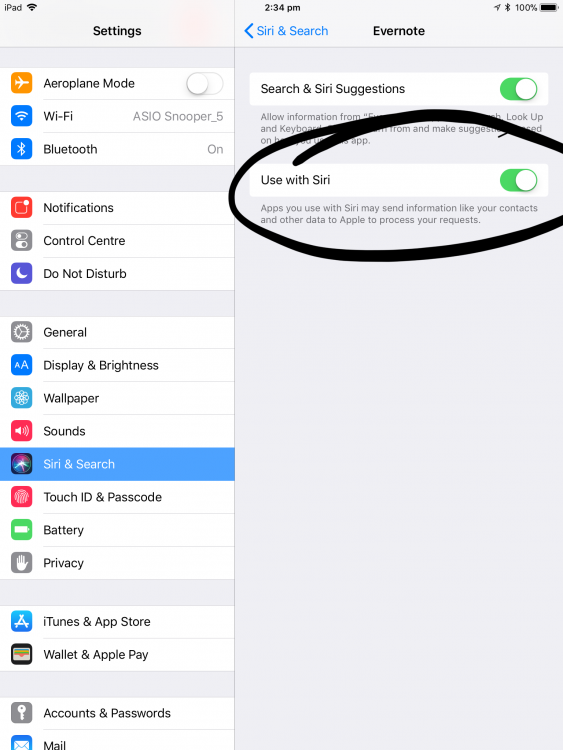
I updated my iPad Pro and iPhone 7 Plus to iOS 11 today and noticed under Settings > Siri & Search > Evernote on the iPad this new “Use With Siri” option. I turned it on, tried a few things, but nothing worked. So I posted on the Evernote forum and DT Low gave me the secret mantra.
Hey Siri Create a note in Evernote called Testing
Hey Siri Find a note in Evernote
The first time I tried this on the iPad, Siri told me something like “I’m sorry (Dave, but I can’t do that) – you’ll need to open Evernote to continue.” So I let her do that and that’s where the experiment ended. But I tried again, invoking Siri from the lock screen, and TADA. It worked. Now I can create and search notes using Siri! I can die a happy man.
Except – the “Use With Siri” option doesn’t appear on the iPhone 7 Plus and I don’t know why.
evernote ios 11 use with siri
Update: Doh! To get it working on the iPhone I just had to update the Evernote app!
I’ve wasted hours of the last couple of weeks trying to work out how to print 3×5 index cards from Word via my Canon MP250. I finally worked it out today and here’s how I did it.
First of all, it’s worth knowing that the Canon Mp250 will NOT print 3×5 cards. So stop trying.
It WILL, however print 4×6 index cards – so go down to your nearest office supplies place and buy some of those.
If you’re on a Mac, go to FILE>PAGE SETUP and select 4×6
Copy and paste your content into this document.
Place cards in printer vertically (ie with smallest edge at the top)
aaaaand print!
These days I’m using index cards to memorise a bunch of things, including the opening monologue for my documentary about Jesus, the entire text of The Raven by Poe, and a bunch of random facts I want to remember. I’ve tried using Evernote as flash cards over the years, but it just doesn’t work for me. I can carry around flash cards made from index cards in my pocket or briefcase and just test myself whenever I have a few minutes. Sometimes you just can’t beat the old school methods.
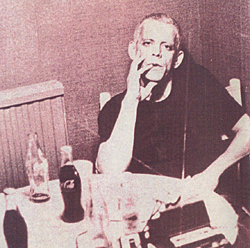
This has to be one of the last times Lou ever performed his biggest hit live. I saw him play live twice over the years and never saw him play it.
Speaking of Lou, I stumbled across this VERY high quality live bootleg from 9 October 1974 (the day before my 4th birthday), the “Sally Can’t Dance” Tour, featuring Prakash John on bass but without Dick Wagner and Steve Hunter, who had left his touring band by this stage (ROCK N ROLL ANIMAL was recorded ten months earlier). This was the tour where journalist Nick Kent from NME commented that Lou looked like a “ravaged monkey”.
The latest version of Garageband iOS is really a fun composing tool. I spent my lunchbreak adding a guitar track to a song I’ve been working on. So much fun.
I”ve been working on client stuff all day, now I’m going to try to get in a few hours on the documentary.
I’ve been listening to a recent episode of Mac Power Users dedicated to Hazel. I fucking LOVE Hazel and it’s one of those tools that I love to tinker with (but try and limit how much time I sink into it). I’m always looking for new ways to use it and I guess it’s time I give back by sharing some more of my favourite rules.
DRIVE MANAGEMENT
This rule I created early in 2015 to archive files off of my Macbook Pro drive is still working great, albeit with a few minor tweaks. Macbook drives are pretty low on storage these days, and I deal in a lot of large audio files, so I need Hazel to keep a close eye on them and offload them onto USB drives about a month after I create them.
PHOTO BACKUP
Photos and videos take up a lot of room too, so I use Hazel to take all of them that are a month old and archive them to Dropbox. That way I can pull them up on my phone or Mac whenever I need them, but they are out of the way.
BOOKS INTO EVERNOTE
For all of my history podcasts, I like to have text versions of my source books in Evernote so I can cut and paste as needed. So when I download a new Kindle book from Amazon, Hazel notices the new file (in the Kindle folder), and opens it in Calibre, when then converts the epub into a text file. Hazel then grabs the new text file (from the Calibre directory) and opens it in Evernote.
STICKIES
I use Stickies a lot to store bits of data I often need quickly – eg URLs for podcast feeds that people ask me for, Textexpander shortcuts, Macbook keyboard shortcuts, etc. But from time to time I want to do a clean install of OSX on my Mac and the Stickies database usually isn’t something I remember to backup, because it’s buried in the app directory. So I have Hazel take a daily backup of it for me and throw it into Dropbox.
Email me or leave a comment if you have cool Hazel rules to share.
Since I bought my latest 13″ Macbook Pro with the minuscule on-board flash storage, I’ve had to build systems to offload large and/or old files onto external storage. But to make sure I always have access to those files even when I don’t have my Macbook or USB drives close at hand, I’ve got the current docs stored in Google Drive. Anything that’s six months old or older, is archived in Dropbox. So I need to search for them from time to time and I wanted Alfred to do that for me. For some reason Dropbox search isn’t built into Alfred’s web search features, so I built a custom search and now I’m sharing it with you.
I’m often only interested in the search results that are fairly recent – for example, if I’m looking for “great apps for iphone”, I don’t want results from 2007. But if you perform a search in Google, there’s no simple way to restrict it’s time query except for mucking about with the “search tools” options, which adds clicks and time and cognitive load to a search.
Fortunately I’ve just found a clever way to do it in Chrome (Mac), thanks to PigeonLab.
If you open up Chrome’s preferences, you’ll find a section that allows you to add new search engines.
Once you open that up, if you scroll to the bottom, you’ll find this box:
Then, follow PigeonLab’s instructions:
Add a name for your new engine, a keyword to use to trigger the use of this engine, and the following URL
http://www.google.com/search?q=%s&tbs=qdr:y&tbo=1
This URL is set to only return results from the last year. You can also use the following to set your preferred time frame. Just replace the “tbs=qdr:y” between the ampersands in the URL with one of the time frame codes from the list below.
Then click somewhere else in the pop-up window to unset the focus from your new engine.
Once your new engine is no longer highlighted it will be moved into alphabetical order in the list
Find your new engine and hover over it, a blue “Make Default” button should appear near the right hand side of the engine URL. Â Click the button to make this engine the default and don’t forget to click the save button at the bottom of the pop-up window.
BOOM! all your searches in the omnibox should now return only results from the last 12 months.